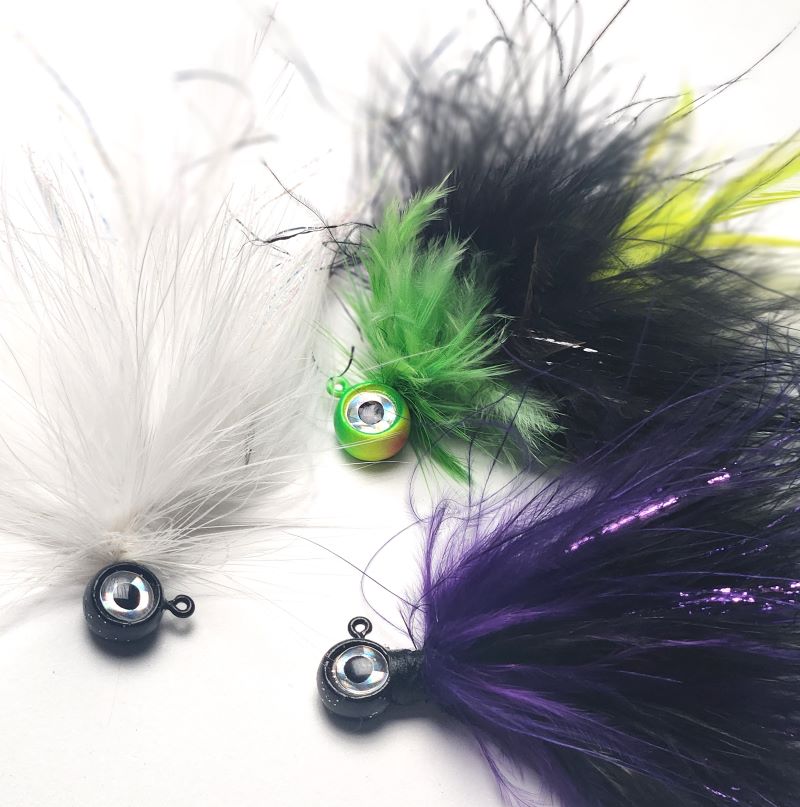
How to Make Marabou Jigs for Fishing: Step-by-Step Guide
Share
Introduction to Marabou Jigs: A Must-Have for AnglersMarabou jigs are a timeless fishing tool, revered for their lifelike movement and ability to attract a wide variety of fish species. Made from soft, pliable turkey down feathers, marabou jigs "breathe" in the water, mimicking live bait with fluid, natural motions. Whether you're targeting fish that feed on water insects or other fish, these versatile jigs are highly effective. In this guide, we’ll walk you through how to make marabou jigs at home with simple materials and fly-tying techniques. Perfect for beginners and seasoned anglers, this DIY marabou jig tutorial will help you craft lures that boost your fishing success.
Why Choose Marabou Jigs for Fishing?Marabou jigs are popular because of their unique characteristics:
- Lifelike Movement: The soft marabou feathers move fluidly, even when the jig is still, creating a "breathing" effect underwater.
- Versatility: Effective for species like bass, trout, crappie, and panfish that feed on insects or smaller fish.
- Customizable: Available in various colors, allowing you to tailor jigs to specific fishing conditions.
- Cost-Effective: Making your own marabou jigs saves money and lets you experiment with designs.
Materials Needed for DIY Marabou JigsBefore starting, gather these essential tools and materials for crafting high-quality marabou jigs:
- Fly tying vise
- Thread bobbin
- 3/0 thread (matching or contrasting color)
- Scissors
- UV soft resin glue for fly tying
- 1/4 to 1/2 ounce jig head (painted or unpainted)
- Marabou feathers (choose desired colors, e.g., chartreuse, white, or black)
- Flashabou (optional, for added sparkle)
- UV flashlight (optional, for curing glue)
Step-by-Step Guide: How to Make Marabou JigsFollow these detailed steps to craft your own marabou jigs at home.
Step 1: Set Up Your Fly Tying StationSecure the jig head in the fly tying vise, ensuring the hook shank is accessible. A stable setup is crucial for precise tying. Organize your materials for easy access to streamline the process.

Step 2: Prepare the Jig Base
- Wrap the 3/0 thread tightly around the hook shank, starting near the jig head and moving toward the hook’s bend.
- Overlap the thread to anchor it securely, creating a solid foundation.
- (Optional) Apply a thin layer of UV soft resin glue over the thread wraps and cure it with a UV flashlight or sunlight for added durability.

Step 3: Add Flashabou for Extra Flair (Optional)For a sparkling effect that attracts fish, incorporate Flashabou:
- Cut a length of Flashabou twice the desired final length.
- Lay it across the hook shank, centered, and secure it with a few thread wraps.
- Fold the Flashabou over the shank and wrap tightly with thread, doubling the strands for a fuller effect.
- Trim any excess for a clean finish.

Step 4: Tie the Marabou Feathers
- Select a marabou feather and remove several quills from the base to create a clean tying surface.
- Position the feather’s stem against the jig head, with the feather tips extending past the hook.
- Secure the stem to the shank with tight thread wraps.
- Gently wrap the feather around the shank, pulling it downward toward the hook point to create a flowing skirt.
- Secure the feather’s tip with additional thread wraps, folding over any excess for a neat finish.
Step 5: Add More Feathers for Volume
- Repeat Step 4 with 2–3 additional marabou feathers, depending on desired fullness.
- Mix colors (e.g., black and chartreuse) for a custom look or stick to a single color for simplicity.
- Ensure each feather is securely tied to avoid unraveling during casting.
- After securing all feathers, add a few extra thread wraps for reinforcement.
- Tie 3–4 overhand knots to lock the thread in place.
- Trim excess thread with scissors for a clean finish.

Step 7: Finalize with UV Glue
- Apply a small amount of UV soft resin glue over the thread wraps at the jig head.
- Cure the glue using a UV flashlight (or sunlight) for a few seconds until hardened.
- Your marabou jig is now ready for fishing!

Tips for Using Marabou Jigs Effectively
- Experiment with Colors: Bright colors like chartreuse or white work well in murky water, while natural tones like brown excel in clear water.
- Vary Retrieval Techniques: Try slow retrieves, jerks, or pauses to mimic live bait.
- Target Species: Use marabou jigs for bass, crappie, trout, or panfish in freshwater lakes, rivers, or streams.
- Check Local Conditions: Research fishing spots and conditions on platforms like X to optimize your jig choice.
Why Make Your Own Marabou Jigs?
Crafting DIY marabou jigs is not only cost-effective but also allows you to customize lures for specific fishing environments. Plus, the process is rewarding and lets you connect more deeply with the art of fly tying. For more fishing lure tutorials, explore our DIY fishing gear guides https://vandutchfishing.com/blogs/instructions.
