
Anglers seeking to elevate their fishing game often turn to specialized techniques like using a worm harness. A worm harness is a proven method for targeting a variety of fish species, including walleye, perch, and panfish. This article will guide you through the process of tying a worm harness, helping you become a more effective angler on the water.
Step 1: Gather Your Materials
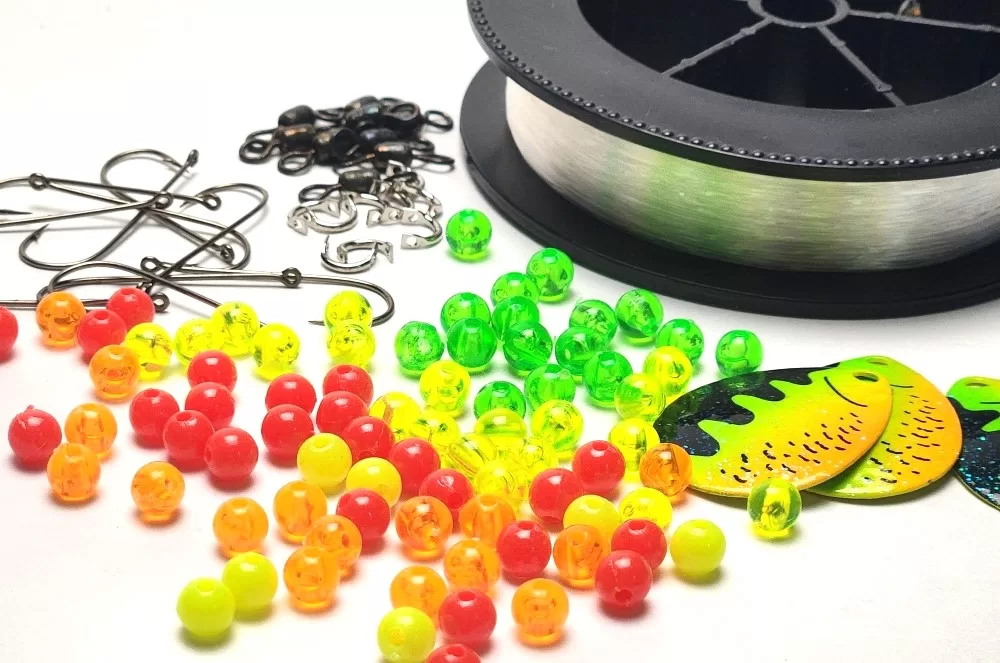
Before you begin, make sure you have all the necessary materials at hand:
1. Line: Opt for a fluorocarbon or monofilament leader line of about 12 to 20 pounds test strength. This helps prevent fish from detecting the line and ensures it can handle the weight of the rig.
2. Hooks: Choose the appropriate size and style of hooks for your target species. Octopus-style hooks are commonly used for worm harnesses. A Bait holder or a floating jighead also work.
3. Beads: Plastic or metal beads are essential for creating separation between the hooks and the attractor blades.
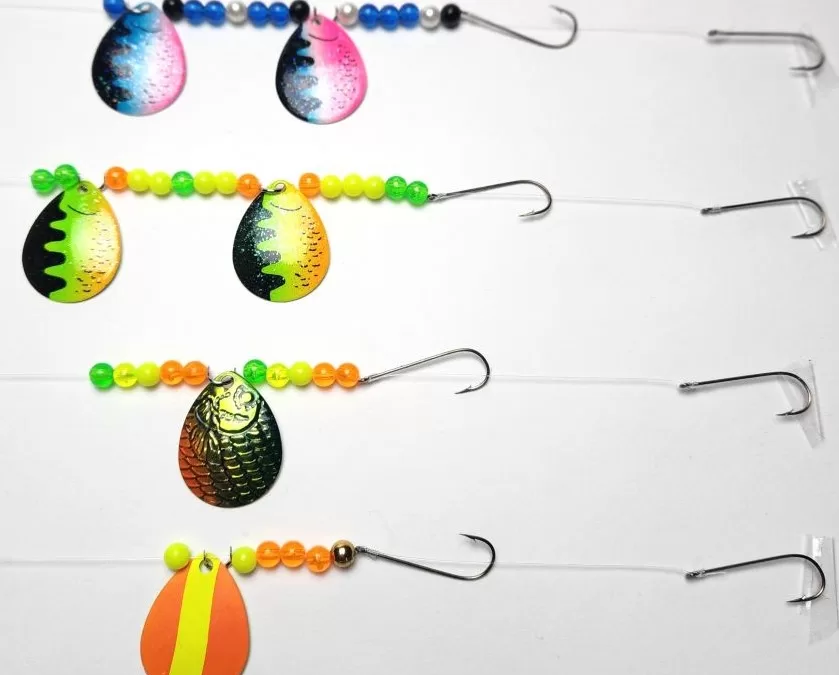
4. Attractor Blades: Willow leaf or Colorado blades are popular choices for worm harnesses. These blades add flash and vibration to attract fish.
5. Clevises: These are small metal or plastic pieces that attach the blades to the line.
6. Swivels: A high-quality swivel prevents line twist caused by the spinning blades.
7. Worms: Of course, live worms are the star of the show. Use nightcrawlers or smaller worms like red wigglers. Soft plastics can also be used on worm harnesses.

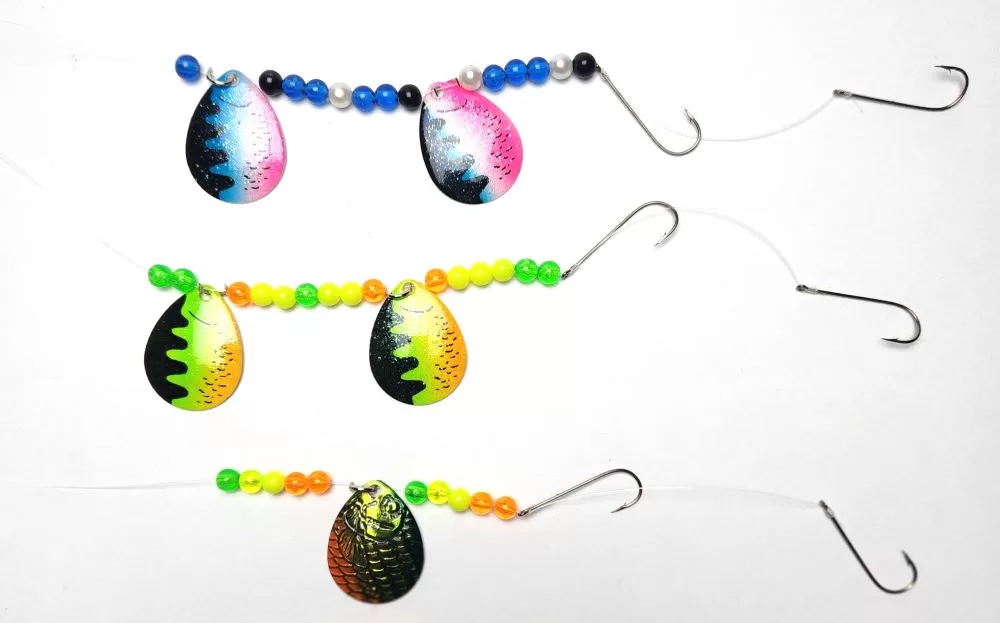
Step 2: Tying the Hooks
1. Cut a 24″ to 72″ piece of line. Snell your first hook at the end of the line. Cut off the extra line after you are done tying your snell knot.
2. Snell your second hook leaving a 2.5″ to 3″ gap between the two hooks. Ensure the hooks are secure.
Step 2: Assemble the Components
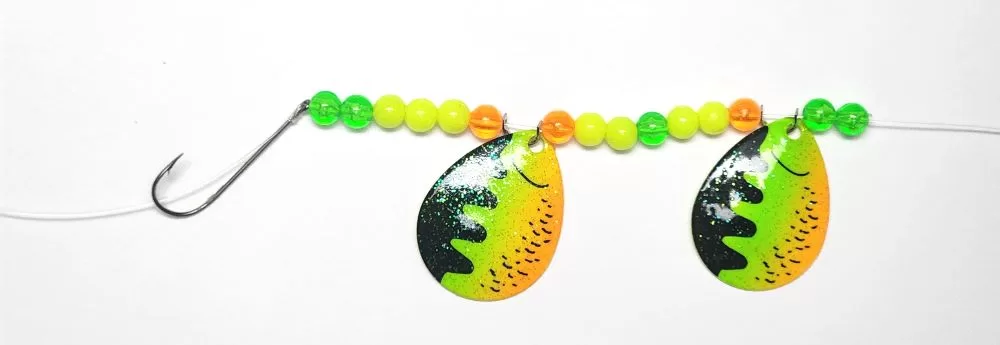
1. Add Beads: Slide a few plastic or metal beads onto the line. Add enough beads or spacers so your blade rests above the top hook. It usually takes 5 to 6 6mm beads. You can also use a stack bead, a harness spacer , floats, or a combination of these. These will prevent the blades from tangling with the hooks.
2. Attach Clevis: Slide a clevis onto the leader line after the beads. The clevis will hold the attractor blade.
3. Add Blade: Insert the hole of the attractor blade into the clevis, securing it in place. The blade should rotate freely.
4. Second Clevis and Blade (Optional): For added attraction, you can add a second clevis and blade along with another set of beads after the first one. This is especially effective in murky water.
5. Add a topper “eye” beads if desired.
6. Finish off your Worm Harness with a barrel swivel or tie a Perfection loop knot.
Step 4: Finishing Touches
1. Thread Worms: Thread live worms onto the hooks. You can use one or two worms per hook, depending on their size.
2. Adjustment: Adjust the position of the attractor blades and beads along the leader line to ensure the rig spins smoothly in the water.
Tying a worm harness is a skill that opens up new possibilities for anglers looking to catch a wide range of fish species. By mastering this technique, you can effectively present live worms to hungry fish, increasing your chances of a successful fishing trip. Remember, practice makes perfect, so experiment with different setups and fine-tune your worm harness to suit the preferences of your target fish. With dedication and patience, you’ll soon find yourself reeling in impressive catches with your expertly tied worm harness rig.